


Making contributions
In this section

How do I complete an exception schedule using a CSV file template?
If you have lots of workers you’re required to submit a payment for using an exception schedule, you can save time by using our CSV file template to create a file to upload.
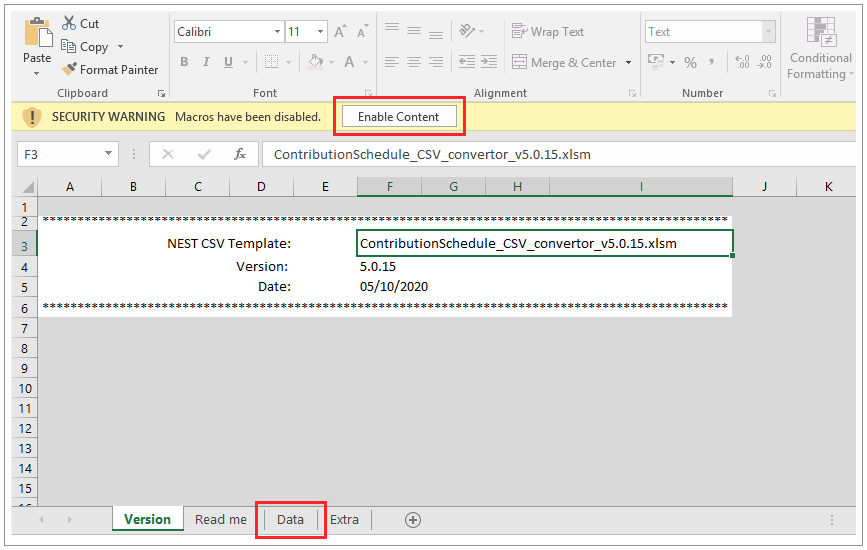
Step 1 – download the CSV file.
- Download the Nest CSV templates (ZIP).
- Open the folder ‘NEST CSV templates’.
- Open the file ‘CSV_converter_contribution_schedule’.
- Once the file is open, click ‘Enable Content’ to enable macros and then click on the ‘Data’ tab at the bottom of the sheet.
Step 2 – Enter the details.
- NEST Employer reference – this is the Nest reference number for the employer’s account starting with EMP followed by nine digits. Once you login to the Nest account, you can find the reference number below Your NEST employer ID at the top right hand side of the page.
- Process type - select ES – exception schedule from the drop-down menu.
- Payment source – this is the name of the Nest payment source selected while creating the exception schedule on the account. You’ll need to enter the payment source name in the file exactly as it is in the exception schedule.
- Reason for Exception schedule – please ensure that the reason you’ve selected in the CSV file matches with the reason you’ve selected for creating an exception schedule on the Nest account.
- Generation date (YYYY-MM-DD) – enter the date when the exception schedule was created on the employer’s Nest account.
- Total number of member records – this is the total number of member records that are required to be paid on this schedule. For example, if you want to pay contributions for five members, you’ll need to enter 5.
- NI number – enter the National Insurance number of the member.
- Alternative unique identifier – if the National Insurance number is unavailable, you’ll need to provide this unique number to identify the member. It can be found by clicking the orange icon below View/Edit for the member from the Manage workers page of the Nest account.
- Employer contribution – the amount to be contributed as employer contribution, if none leave blank.
- Member contribution - the amount to be contributed as member contribution, if none leave blank.
- Leave all other fields blank.
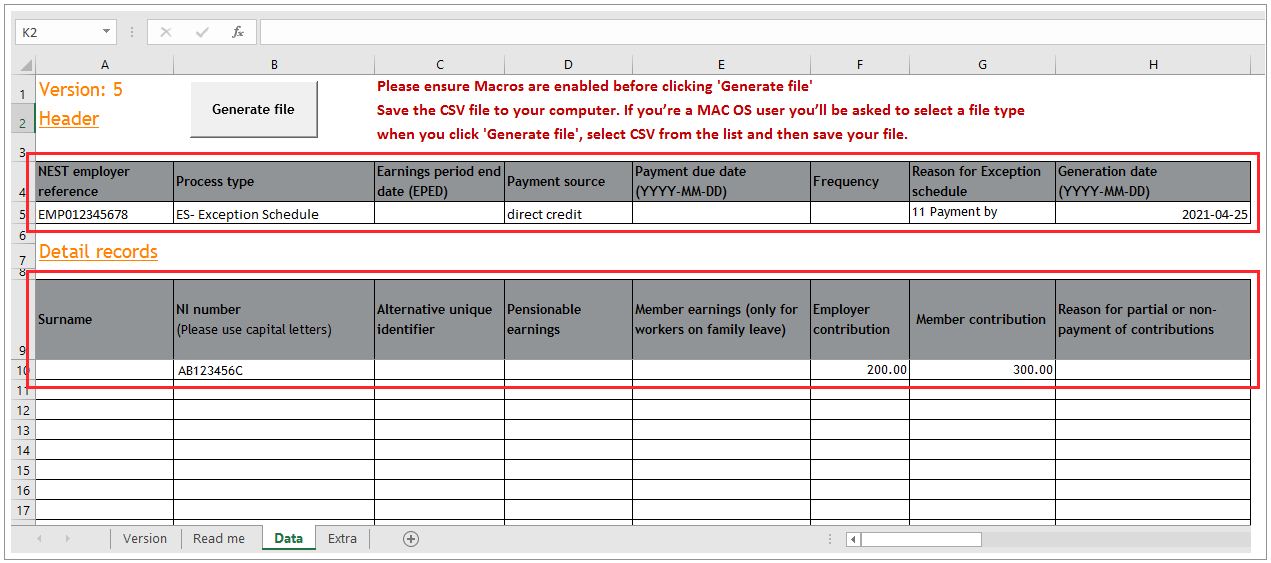
- Check if the information updated in the file is correct, then click ‘Generate file’ and save it on your desktop in CSV format.
- Please do not open the file after saving as this may corrupt the file.

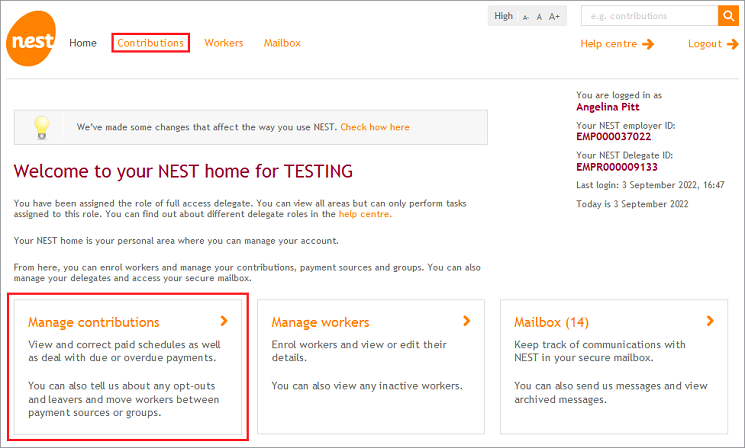
Step 3 – Upload the file.
- From the Nest account, click either ‘Contributions’ or ‘Manage contributions’ on the homepage.
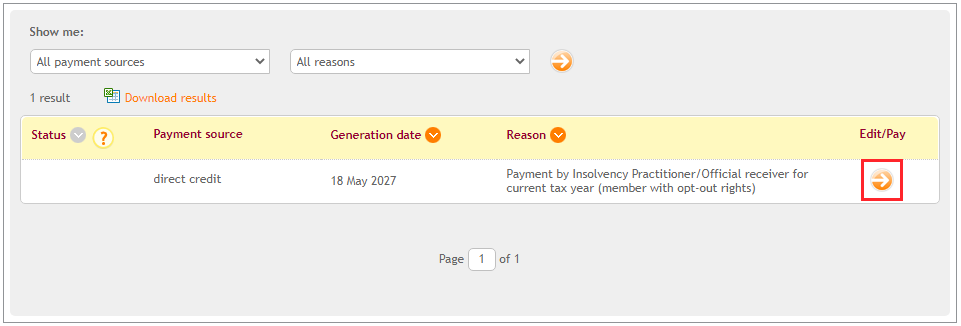
- Click ‘Exception schedules’.
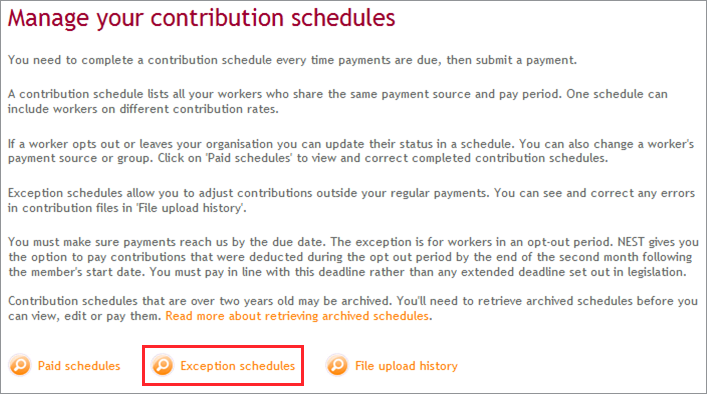
- Click the arrow icon below Edit/Pay.
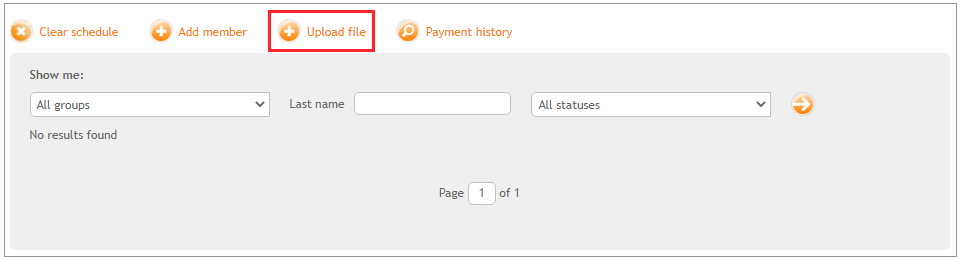
- Click ‘Upload file’ to upload the CSV file you’ve created.
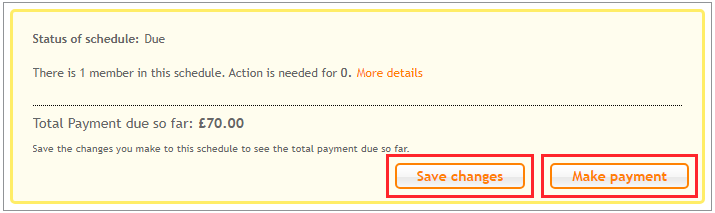
- Once the file is uploaded, you can click ‘Save changes’ and then click ‘Make payment’.
We value your feedback
Your feedback is important to us. To help us improve, tell us what you think about our employer help centre by taking a short survey.
Was this helpful to you?
Thank you.


 Live chat
Thank you.
Thank you for the feedback.
Feedback
Was this helpful to you?
Live Chat
Our live help agents will answer your questions and guide you through setting up and managing NEST.
Our chat is available from Monday to Sunday from 8.00AM to 8.00PM
Web chat is currently unavailable
We're open from 10.00 am until 4.00 pm today. Please try again between these hours or our usual business hours of 8am to 8pm Monday to Sunday. Or you can visit our online help centre.
Web chat is currently unavailable
Our offices are now closed for the Bank Holiday. You can reach us during our normal opening times of 8am to 8pm Monday to Sunday. Or you can visit our online help centre.
Welcome to live help
To help us deal with your question quickly please tell us who you are and what you'd like help with by choosing an option from each of the menus below: