


My details and preferences
In this section

How do I resize an image file before sending it to Nest?
Key points:
- This article explains how to resize an image file before sending it to Nest.
- The article has screen by screen guides for resizing image files on Microsoft Windows OS and macOS.
What do I need to know before sending a document to Nest?
- You need to send us copies of the documents from your Nest secure mailbox.
- We accept documents in .jpeg, .gif, .tiff, .doc, .docx, .xls, .xlsx and .pdf file types.
- Documents up to a file size of 2 MB can be sent. Larger files must be resized.
- You’ll need to check that resized documents are readable before sending them to Nest.
- You can only add one attachment per email. If you have more attachments, you should send us multiple emails from your Nest secure mailbox.
How do I resize an image file on Microsoft Windows OS using Microsoft Paint?
- Make a copy of the original image before resizing it.
- Select the copy of the image file you want to resize and right click on it.
- Click ‘Open with’ in the drop-down menu.
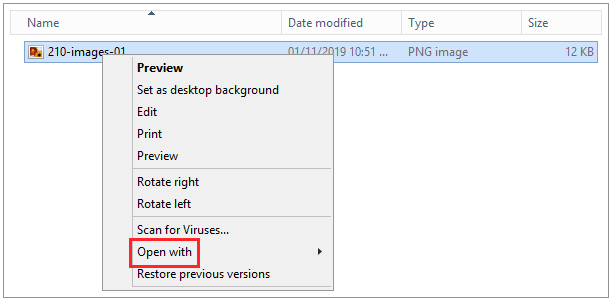
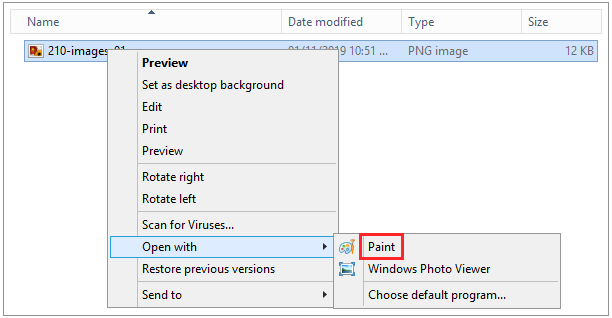
- The drop-down menu will extend further showing you a list of applications.
- Click ‘Paint’ to open the image in Microsoft Paint.
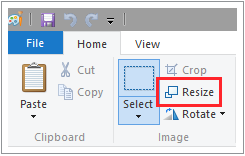
- Click ‘Resize’ in the Home panel to open the resize tool.
- Ensure that the ‘Maintain aspect ratio’ option is checked.
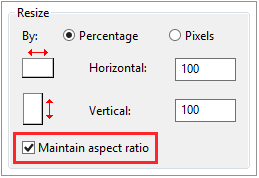
- Under Resize By select ‘Percentage’.

- Your image will start at 100 for both the horizontal and vertical values. Changing these to values less than 100 will reduce your image size. For example, changing these values to 75 will reduce the image to three-quarter of its original size.
- Once done, click ‘OK’ to resize the image.

- Press Ctrl + S to save the changes to your image and close Microsoft Paint.
- Check that the saved image file size is less than 2 MB.
- You may have to reduce the percentage values further if the image file size still exceeds 2 MB.
- Open the saved image file to check if it’s readable before sending it to Nest.
How do I resize an image file on macOS?
- Make a copy of the original image before resizing it.
- Select the copy of the image file you want to resize and open it by double clicking on it.
- The image will open in Preview.
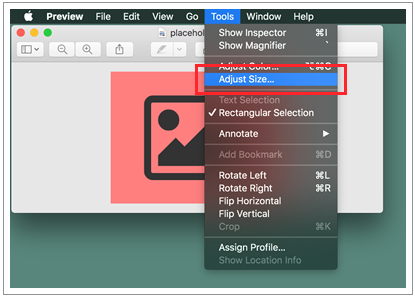
- Click ‘Tools’.
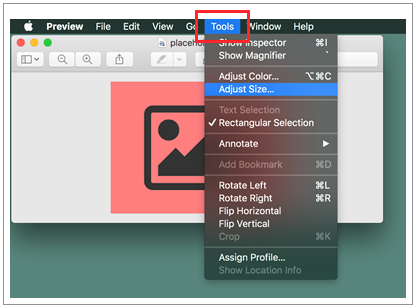
- Click ‘Adjust size’ in the drop-down menu to open the resize tool.
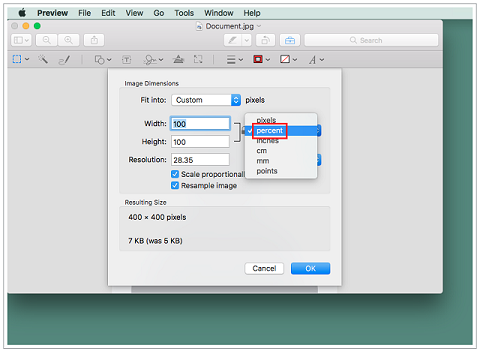
- Ensure that the ‘Scale proportionally’ option is checked.
- Click ‘pixels’ to the right of the Width and Height fields and select ‘percent’ from the drop-down list of options.
- Adjust the width and height values to reduce the image size.
- Your image will start at 100 for both the width and height. Changing these to values less than 100 will reduce your image size. For example, changing these values to 75 will reduce the image to three-quarter of its original size.
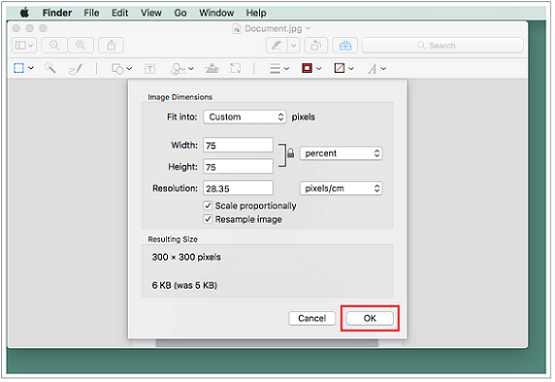
- You can check the resulting size at the bottom of the box to ensure that the image size is less than 2 MB.
- You may have to reduce the percentage values further if the image file size still exceeds 2 MB.
- When ready, click ‘OK’ and exit Preview.
- Open the saved image file to check if it is readable before sending it to Nest.
We value your feedback
Your feedback is important to us. To help us improve, tell us what you think about our member help centre by taking a short survey.
Was this helpful to you?
Thank you.


 Live chat
Thank you.
Thank you for the feedback.
Feedback
Was this helpful to you?
Live Chat
Our live help agents will answer your questions and guide you through setting up and managing NEST.
Our chat is available from Monday to Sunday from 8.00AM to 8.00PM
Web chat is currently unavailable
We're open from 10.00 am until 4.00 pm today. Please try again between these hours or our usual business hours of 8am to 8pm Monday to Sunday. Or you can visit our online help centre.
Web chat is currently unavailable
Our offices are now closed for the Bank Holiday. You can reach us during our normal opening times of 8am to 8pm Monday to Sunday. Or you can visit our online help centre.
Welcome to live help
To help us deal with your question quickly please tell us who you are and what you'd like help with by choosing an option from each of the menus below: